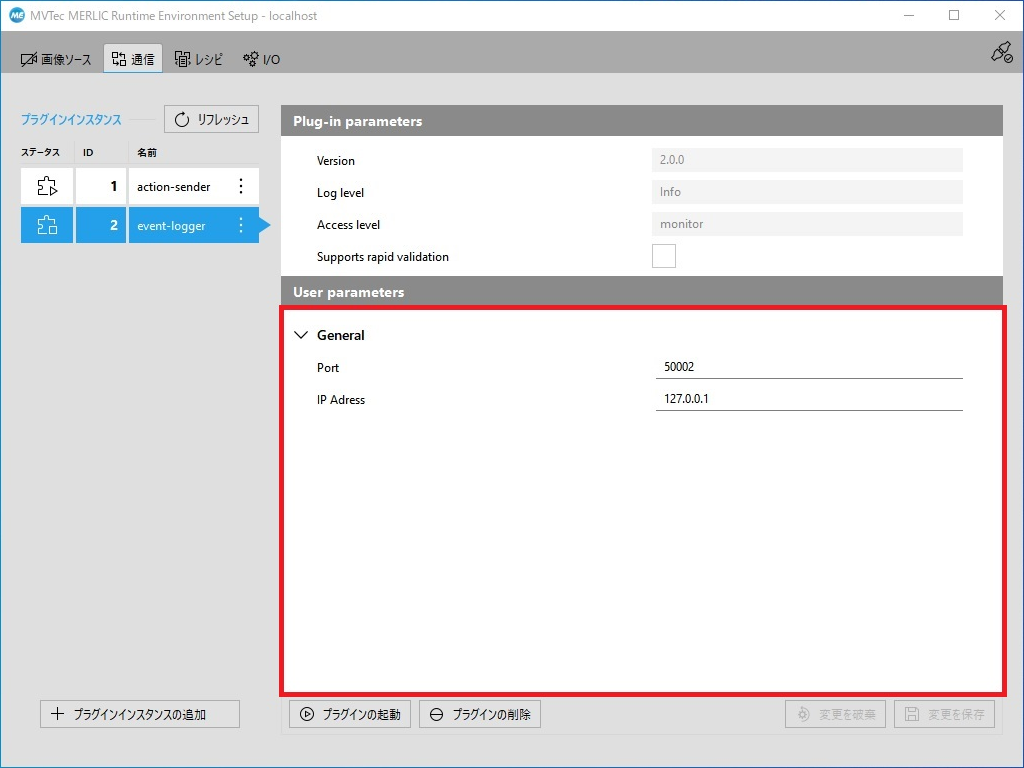
MERLICインストール時に登録されているPluginのevent-loggerを修正し、検査結果を出力する方法を説明します。
ビルド方法はマニュアルに載っていますので、そちらを参考にしてください。
修正するファイルは、<InstallDir>\examples\communicator_plugins\event-loggerにあります。
<InstallDir>はMERLICをインストールしたパスになります。
C++で記述されたコードを一部修正します。
1.Configクラスの作成(Config.h, Config.cppファイルの作成)
出力先のデバイスのIPアドレス、ポート名をMERLIC RTE より設定できるように変更します。
設定はConfig.h, Config.cppに記述し、ファイルは新規に作成します。

空のConfig.hとConfig.cppファイルを作成し、以下コードをコピーします。
#ifndef plugins_event_logger_Config_h
#define plugins_event_logger_Config_h

#include <mvtec/plugin-support/v1/Config/Builder.h>
#include <mvtec/plugin-support/v1/Config/Description.h>
#include <mvtec/plugin-support/v1/Config/PluginConfig.h>
#include <mvtec/plugin-support/v1/Config/Validation.h>
#include <mvtec/plugin/mv_plugin_control_def.h>

#include <string>

namespace pMVEventLogger
{
    struct Config
    {
        std::uint16_t port = 50001;
        std::string ip_adress = "127.0.0.1";
    };

    struct ConfigDescription
    {
        Config const defaults{};

        MVPlugin::Config::ConfigEntry<std::uint16_t> port = MVPlugin::Config::AddConfigEntry<std::uint16_t>()
            .WithName("parameter_port")
            .WithDisplayName("Port")
            .WithDefaultValue(defaults.port)
            .WithValueRange({ 49152, 65535 })
            .Build();

        MVPlugin::Config::ConfigEntry<std::string> adress = MVPlugin::Config::AddConfigEntry<std::string>()
            .WithName("parameter_adress")
            .WithDisplayName("IP Adress")
            .WithDefaultValue(defaults.ip_adress)
            .Build();

        MVCode_t             Validate(Config const& actual_config, MVPlugin::Config::Validation& validation) const;
        [[nodiscard]] Config Read(MVPlugin::Config::PluginConfig const& actual_config) const;
    };

}

#endif // plugins_event_logger_Config_h
#include "Config.h"

using namespace MVPlugin;

namespace pMVEventLogger
{

	MVCode_t ConfigDescription::Validate(Config const&, MVPlugin::Config::Validation&) const
	{
		return MV_CODE_OK;
	}

	Config ConfigDescription::Read(MVPlugin::Config::PluginConfig const& actual_config) const
	{
		auto const fetch_config_value = [&actual_config](auto const& param) -> decltype(param.defaultValue) {
			try
			{
				return actual_config.GetValueFor(param);
			}
			catch (...)
			{
				return param.defaultValue;
			}
		};

		return { fetch_config_value(port), fetch_config_value(adress) };
	}

}
2.PluginクラスでのConfigクラスの処理の記述(Plugin.h,Plugin.cppの修正)
Plugin.hに<Config.h>をインクルードします。
 //Configクラス参照の為追加
#include "Config.h"
Start関数の引数にConfig configを追加します。
 //引数にConfig config追加
 //旧 MVCode_t Start(MVPlugin::AccessLevel access_level) noexcept
  MVCode_t Start(MVPlugin::AccessLevel access_level, Config config) noexcept;
PluginクラスのメンバーにConfig m_Configを追加します。
//メンバー追加
		Config m_Config{};
PluginクラスのStart関数の定義記述部位に①引数にConfig configを追加、②引数のconfigの値をメンバー変数m_Configへ代入します。
//引数にConfig configを追加
MVCode_t Plugin::Start(MVPlugin::AccessLevel access_level, Config config) noexcept
{
    //configデータを代入
    m_Config.ip_adress = config.ip_adress;
    m_Config.port = config.port;

  m_Logger.Debug("Starting event-logger plugin");

  if (access_level == AccessLevel::ControlOnly || access_level == AccessLevel::None)
  {
    m_Logger.Error("The event-logger plug-in has been started with no monitor access.");
    return MV_CODE_CAPABILITY_NOT_SUPPORTED;
  }

  try
  {
    StartEventLoop();
    return MV_CODE_OK;
  }
  catch (...)
  {
    return CatchAndLogException("while starting the event-logger plug-in");
  }
}
3.結果を出力する部分の記述をします。
関数ResultReady内の処理を追加します。
ReasultReadyのイベントが発生した際に、パラメータで登録されたアドレス、ポートにTCPによる通信で検査結果を送信します。
PluginクラスのResultReady関数の処理にTCP通信部分を記述します。
void Plugin::ResultReady(MVPlugin::Result const& result) noexcept
{
  m_Logger.Info("Event 'ResultReady': {}", result);

  //Resultが準備できたらTCP通信により結果を送信する
  using boost::asio::ip::tcp;

  boost::system::error_code error;
  boost::asio::io_service io_service;

 //ソケットの設定
  tcp::socket socket(io_service);
  socket.connect(tcp::endpoint(boost::asio::ip::address::from_string(m_Config.ip_adress), m_Config.port), error);

  if (error) {
      m_Logger.Info("Event connect failed : " + error.message());
      return;
  }
  //検査結果を文字列に変換
  std::string result_str = fmt::format("{}", result.content);
  //検査結果を送信
  boost::asio::write(socket, boost::asio::buffer(result_str), error);

  if (error) {
      m_Logger.Info("Event message send failed: " + error.message());
  }
  else {
      m_Logger.Info("Event message send correct!");
  }

  socket.close();
}
上記変更後、ビルドを実施し生成された<pMVevent-logger.dll>ファイルをbinフォルダへ上書き保存します。
<InstallDir>\\bin\x64-win64
MERLICとDobotの連携 にもどる
