
OpenCascadeでロボットビューワーを作成し、MR(複合現実)等で活用する方法を紹介します。
Webカメラで実在する設備を写した画像にロボットのデジタルデータを重ね合わせることで、事前動作確認などが簡単に、安全に行えます。
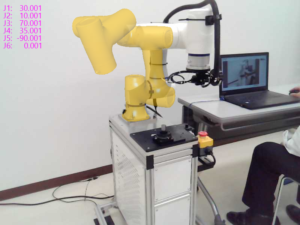
OpenCascadeを活用したアプリケーションを作成し、ロボットの画像を取得。またWebカメラの画像を取得し、重ね合わせの演算をすることで上記の画像を得ることが出来ます。

CADデータの準備
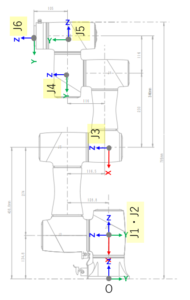
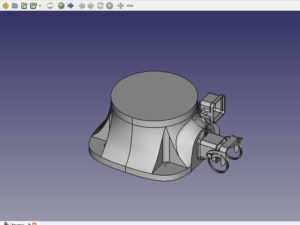
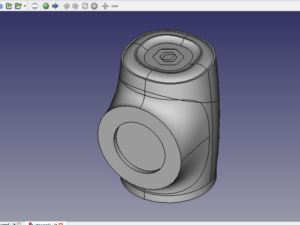
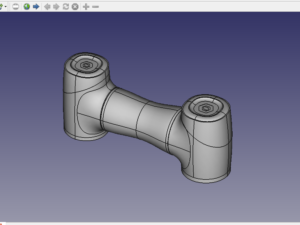
ロボットのCADデータをアーム毎に準備します。また各アームの原点はそれぞれJ1、J2、…、J6となるようにし保存します。BRep形式が読み込みが速く推奨。
OpenCasecadeを活用したロボットビューワーの作成
- 視点、視座、視野角を制御できる関数を使いやすいように独自の関数を準備しておくと良いです。
- 視点を変更する関数
void V3d_View::SetAt(double x, double y, double z); - 視座を変更する関数
void V3d_View::SetEye(double x, double y, double z); - 視野角を変更する関数
void V3d_View::Camera()->SetFOV2d(double fov);
- 視点を変更する関数
- Webカメラの画像サイズに合わせたウィンドウを作成します(C#, Qt, Python Tk等)
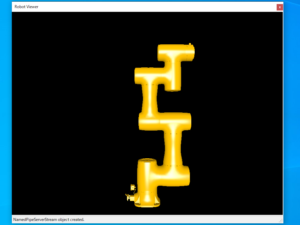
- CADデータをアーム毎にインポートします。
- 各データは別オブジェクト(
AIS_InteractiveObject)となるようにセットします。
- 各データは別オブジェクト(
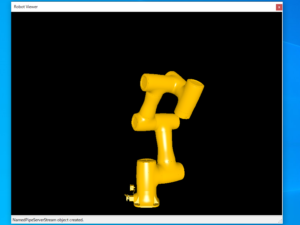
- ベース座標系における各アーム原点、姿勢を順運動学(FK)により求め、ロケーションを変更します。ロケーションを変更することでロボットの姿勢を変更できます。
- FKについてはロボットのデカルト座標値算出方法を参照
- ロケーションの変更については以下のコードを参考にしてください。
//抜粋
void SetLocation(Handle(AIS_InteractiveObject) object, Standard_Real x, Standard_Real y,
  Standard_Real z, Standard_Real rx, Standard_Real ry, Standard_Real rz) {

	auto quaternion = gp_Quaternion();
 //クォータニオンの演算
	quaternion.SetEulerAngles(gp_EulerSequence::gp_Intrinsic_ZYX,
    rz / 180.0 * PI, ry / 180.0 * PI, rx / 180.0 * PI);

	auto trsf = gp_Trsf();
 座標変換情報の設定
	trsf.SetTransformation(quaternion, gp_Vec(x, y, z));
	auto loc = TopLoc_Location(trsf);

 //m_AISContextはHandle(AIS_InteractiveContext)のインスタンス
	m_AISContext->SetLocation(object, loc);
}
- 視点、視座、視野角をWebカメラの設置状態、仕様から設定します。
- ウィンドウに表示された画像を保存します。
bool V3d_View::Dump(string fileName)で画像が取得できます。
Webカメラ画像との合成
今回はウィンドウはC#で作成したため、C#での画像合成をしました。またOpenCVを使ってC++でも作成して処理時間を測ってみましたがほとんど差が見られませんでした。
画像合成の為の関数
  //robotImage ロボットCADの画像
  //backImage Webカメラの画像
 //
  public static void ImageSynthesis( ref Bitmap robotImage, ref Bitmap backImage,
  double transparency = 0.5)
 {
     if (robotImage == null)
         return;
     if(backImage==null)
         return;

     BitmapData bmpDataRobot = robotImage.LockBits(new Rectangle(0, 0, robotImage.Width,
    robotImage.Height), ImageLockMode.ReadOnly,
    System.Drawing.Imaging.PixelFormat.Format24bppRgb);
     byte[] pixelsRobot = new byte[bmpDataRobot.Stride * robotImage.Height];
     System.Runtime.InteropServices.Marshal.Copy(bmpDataRobot.Scan0, pixelsRobot, 0,
      pixelsRobot.Length);

     BitmapData bmpDataBack = backImage.LockBits(new Rectangle(0, 0, backImage.Width,
      backImage.Height), ImageLockMode.ReadWrite,
     System.Drawing.Imaging.PixelFormat.Format24bppRgb);

     byte[] pixelsBack = new byte[bmpDataBack.Stride * backImage.Height];
     System.Runtime.InteropServices.Marshal.Copy(bmpDataBack.Scan0, pixelsBack, 0,
      pixelsBack.Length);

     int width = Math.Min(bmpDataRobot.Width, bmpDataBack.Width);
     int height = Math.Min(bmpDataRobot.Height, bmpDataBack.Height);
     Parallel.For(0, height, i =>
     {
         for (int j = 0; j < width; j++)
         {
             int indexRobot = j * 3 + i * bmpDataRobot.Stride;
             int indexBack = j * 3 + i * bmpDataBack.Stride;
             if (pixelsRobot[indexRobot] != 0 || pixelsRobot[indexRobot + 1] != 0
        || pixelsRobot[indexRobot + 2] != 0)
             {
                 pixelsBack[indexBack] = (byte)Math.Min(pixelsBack[indexBack]
          * transparency + pixelsRobot[indexRobot] * (1 - transparency), 255);
                 pixelsBack[indexBack + 1] = (byte)Math.Min(pixelsBack[indexBack + 1]
          * transparency + pixelsRobot[indexRobot + 1] * (1 - transparency), 255);
                 pixelsBack[indexBack + 2] = (byte)Math.Min(pixelsBack[indexBack + 2]
          * transparency + pixelsRobot[indexRobot + 2] * (1 - transparency), 255);
             }
         }
     });
     System.Runtime.InteropServices.Marshal.Copy(pixelsBack, 0, bmpDataRobot.Scan0,
    pixelsBack.Length);
     robotImage.UnlockBits(bmpDataBack);
     backImage.UnlockBits(bmpDataBack);
 }